Showing posts with label pattern. Show all posts

Tuesday, August 5, 2014

New Pattern! Cherry Crochet Potholder


I am so excited to announce the release of my new Crochet Cherry Potholder Pattern!

You can find it available for purchase in my etsy shop 

as well as on Ravelrly

This adorable potholder is the perfect touch for any vintage kitchen out there as well as any cherry lover! The potholder is quick and easy and can be made up in an evening of crafting.
Pattern includes both written instructions as well as photos.
Writtten in US terms.


Thursday, May 29, 2014

Vintage Camera Pillow Pattern

I'm super excited today to finally be able to release my Vintage Camera Pillow Pattern!


Based off of my favorite app, Instagram, this pillow adds that fun pop of personality to any room.The pattern is great for a beginner as you just need to know basic crochet stitches.

You can find the pattern in my etsy shop: link
as well as Ravelry: link 

The perfect pattern for this weekend's crafting :)

Sunday, March 9, 2014

New Pattern - Vintage Inspired Crochet Flower Potholder

Hi everyone!

I am so excited to introduce you to my newest pattern...  The Vintage Inspired Crochet Flower Potholder. I created it after being inspired by a gorgeous vintage red rose potholder that I own. It is so intricate and delicate made out of cotton crochet thread and a teeny tiny hook. I wanted to make something similar in style, but more modern by using worsted weight cotton. Here is what I came up with and I have to say I'm in love! They look perfect in my vintage inspired kitchen and are adorable grouped together on the wall as art. I hope you will love the pattern as much as I do! It is now available in my shop as an instant download. It's the perfect lazy Sunday project!


Thursday, August 8, 2013

Crochet Owl Pillow Pattern

Hi everyone! Finally the pattern for the crochet owl pattern is now available in my shop!

   You can find it here!


It is the perfect pattern for beginners. It includes lots of pictures as well as a printer friendly version. I'm always here to help with any crochet questions you may have.

Hope you are all having a wonderful week!

Wednesday, November 21, 2012

Crochet Owl Ornament Pattern

Thank you so much everyone for your sweet comments on my blanket! You guys are the best! It seemed everyone who commented puts up their tree either the weekend after Thanksgiving or the first week of December, so to get you ready for tree decorating here is the pattern for a little crochet owl ornament!


 Materials:
  • scrap worsted weight cotton
  • size US H crochet hook
  • black brads or black buttons
  • poly-fil stuffing
  • stitch marker 
Notes: The body is worked in a spiral so you will not slip stitch at the end of each row. Instead place a marker so you know where the beginning of the next row is. I like to use a small piece of contrasting scrap yarn because it is easier to just pull out and place between the stitches.

Body:

I used the colors pink (A), green (B) red (C), blue (D).
With Color A make magic loop
Row 1: 12 sc in loop (12sc)
Row 2: *Sc 1, 2 sc in the next sc*, rep 6 times. (18sc)
Row 3: *sc 2, 2 sc in the next sc*, rep 6 times. (24sc)
Row 4: *sc 3, 2 sc in the next sc*, rep 6 times. (30sc)
Row 5:  Sc in each sc around. (30sc)
Row 6-7:  Change to color B and sc in each sc around.(30sc)
Row 8-9:  Change to Color C, sc in each sc around. (30sc)
Row 10-11 Change to color D, sc in each sc around. (30sc)
Row 12: Change to color A, sc in first 3sts, decrease (sc2tog), sc in each st. (29sc)
Row13-18: sc in each sc around. (29sc)
Row 19: Sc in next 4 sc,  fold the body on the top and crochet together 6 sts, slip stitch in the sc 1 row below, stuff the owl with poly fil, crochet together last sts, end with a sl.st.
Fasten off. Weave in ends

Eyes (make 2):
magic loop in white.
Row 1: ch3, 11 dc in loop. Join with a sl st to top of ch3.
Fasten off. Weave in ends.
Add a black brad or button to center of eye. You can alternatively embroidery a french knot in the center.

Beak:
1) Ch 3, turn.
2) Crochet 2 sc, turn.
3) Crochet 1 sc, turn.
4) Make a sl.st.
Fasten off. Weave in ends.


Assembly:
I am extremely lazy and just glue on the eyes and the beak on to the owl, but feel free to sew them on. If you would like to add a hanging loop, just make a chain of 14 and sew it on the center top of the owl. I decided that I liked the owl better with just a Christmas ornament hook looped through a stitch on the top :)

There you have it a super simple Christmas ornament!
I hope you all enjoy!


Sunday, September 23, 2012

It's Here!

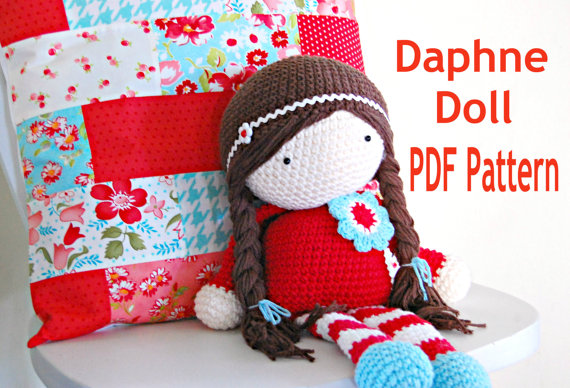
The Daphne Doll pattern is finally ready for sale! I am so excited to share it with all of you!You can purchase it in my etsy shop or you can instantly download it on Ravelry.


This is my first published pattern so if you have any questions or see any obvious mistakes, please do not hesitate to convo me on etsy or email me at hopscotchlaneshop@yahoo.com.

Thank you all again for your encouragement to write the pattern. You guys really kept me motivated!